How to Set Up Alerts for Farm Jobs and Tasks
Farm operations depend on timing and clear communication. Setting up automated alerts ensures your team gets the right updates at the right time, avoiding missed tasks or delays. Tools like HarvestYield simplify this process by providing notifications for job assignments, equipment issues, and inventory updates. Here's a quick breakdown:
- Plan your alerts: Identify tasks needing alerts (e.g., spraying, planting) and assign them to the right team roles.
- Set priorities: Focus on urgent updates like equipment breakdowns, and schedule routine alerts to avoid overloading your team.
- Use HarvestYield: Create user accounts, define job details, and send notifications with GPS directions and weather data.
- Test and improve: Pilot alerts with a small group, monitor performance, and refine based on feedback.
With HarvestYield's 30-day free trial, you can explore these features risk-free. Alerts help streamline communication, reduce confusion, and keep your farm running smoothly.
Plan Your Alert Strategy
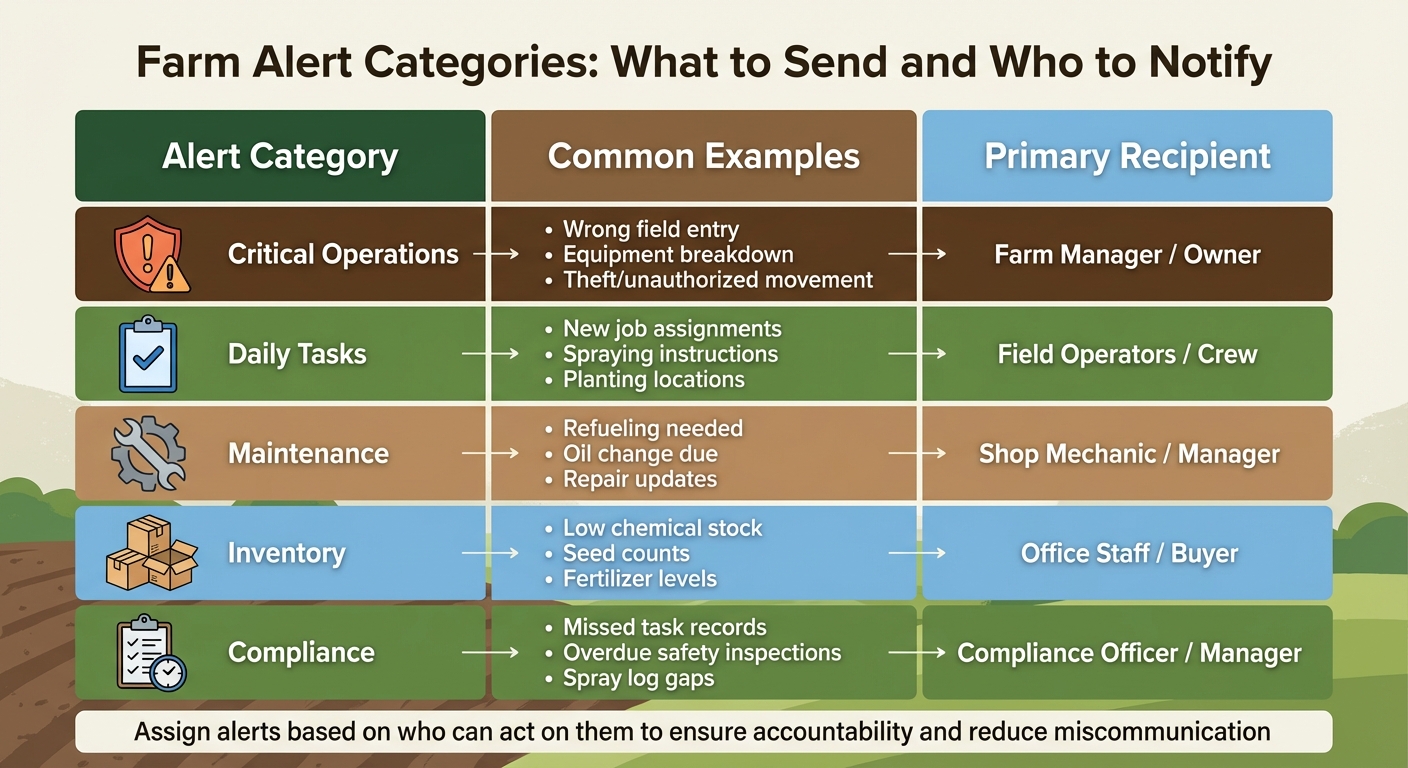
Farm Alert Categories and Recipients Guide
Before activating alerts, take time to map out a clear plan. A thoughtful approach helps cut down on unnecessary notifications while ensuring that critical updates reach the right people exactly when they need them.
Identify What Needs Alerts
Start by pinpointing the tasks and events that require immediate attention. For example, time-sensitive operations like spraying, harvesting, planting, or hauling hay often need alerts to keep everything on schedule. On the administrative side, notifications for new task assignments, missed or skipped tasks, and reminders for "running timers" can help ensure accurate labor tracking and prevent over-logging. For inventory management, alerts for low stock levels - whether it's fertilizer, seed, or chemicals - can help avoid mid-season shortages.
Here’s a breakdown of common alert categories and their recipients:
| Alert Category | Common Examples | Primary Recipient |
|---|---|---|
| Critical Operations | Wrong field entry, equipment breakdown, theft/unauthorized movement | Farm Manager / Owner |
| Daily Tasks | New job assignments, spraying instructions, planting locations | Field Operators / Crew |
| Maintenance | Refueling needed, oil change due, repair updates | Shop Mechanic / Manager |
| Inventory | Low chemical stock, seed counts, fertilizer levels | Office Staff / Buyer |
| Compliance | Missed task records, overdue safety inspections, spray log gaps | Compliance Officer / Manager |
These categories help ensure that alerts are both timely and relevant, keeping farm operations running smoothly.
Set Priorities and Timing
Not every alert needs to be acted on immediately. Distinguish between urgent issues - like equipment breakdowns during harvest or livestock water system failures - and routine updates, such as upcoming maintenance tasks. For high-priority alerts, use distinct notification styles so workers can instantly recognize the most pressing issues.
Timing also matters. Avoid sending non-critical alerts during off-hours or early mornings unless they’re absolutely necessary. Smart monitoring tools can help by catching potential problems - like stored grain spoilage or irrigation system failures - before they escalate, freeing managers to focus on strategic decisions rather than routine checks.
"Smart farming means making your life more efficient, so you don't have to focus on the mundane but instead on making the best product possible. We only have so many hours in a day."
By setting clear priorities and timing, you can ensure alerts are both effective and non-intrusive.
Assign Alerts by Team Role
For alerts to be truly effective, they need to reach the right person. Assign notifications based on who can act on them, ensuring accountability and reducing miscommunication.
- Managers and supervisors should receive high-level updates on job progress, equipment health, and lone worker safety.
- Field operators benefit from task-specific alerts like new assignments, GPS directions, and job notes (e.g., "leave headlands if wet").
- Office staff need automated updates on completed jobs for payroll, compliance reporting, and invoicing.
Lone worker alerts are especially important for safety, with push notifications sent to managers when staff members start and finish jobs in remote areas. Similarly, machine maintenance alerts - covering service intervals and low fuel levels - help prevent downtime during critical operations like harvesting or spraying. Seasonal workers can also benefit from GPS directions and detailed field notes, while managers can monitor worked hours in real time to ensure accurate payroll records.
Set Up Alerts in HarvestYield
Once you've planned your alert strategy, it's time to configure alerts in HarvestYield. The platform uses Activities to track work (like spraying or planting) and Jobs for scheduling tasks that send notifications to your team. Below, you'll find steps to set up user accounts, pick notification channels, and define alert rules.
Set Up User Accounts and Permissions
Begin by creating accounts for everyone who will receive alerts. HarvestYield lets managers set up accounts for all team members, making job scheduling and communication smooth and efficient. To ensure alerts and job details are accessible, each team member should download the mobile app, which works even in areas with weak signals.
Assign permissions based on roles to keep things organized. Managers can create and assign jobs, track worker locations in real time, and oversee all tasks. Field staff, however, only see their assigned tasks and relevant field maps through the app. This separation ensures everyone focuses on what they need to do, without unnecessary distractions or notifications.
Choose Notification Channels
The mobile app is the primary way HarvestYield delivers alerts, offering real-time updates for job assignments and field activities. When a job is scheduled, it’s automatically sent to the assigned operator's device, complete with turn-by-turn directions and a map of all scheduled tasks.
For documentation purposes, such as invoices or detailed job summaries with PDF attachments, email is a great option. Even if your crew is working in remote areas, the platform supports offline functionality. Alerts and job data are saved on the device and synced once an internet connection becomes available.
Create Alert Rules for Jobs and Tasks
Start by defining your Activities. Click "New", enter the work details (e.g., spraying, planting, hauling), and select "Create Activity". This sets up the base for all job-related alerts.
To send a notification, navigate to the Jobs menu and click "New." Fill in the job details - such as the field location, required activity, assigned operator, and scheduled time - and hit "Create Job." This instantly sends the task to the operator's mobile app. The system also generates job sheets, complete with GPS maps and live weather data, giving operators everything they need to start their work. For urgent tasks like spraying, simply create a job with the necessary details, and the operator will be notified immediately.
Make Alerts Clear and Useful
Once your HarvestYield setup is in place, it’s time to fine-tune your notifications. The goal? Ensure every alert prompts swift, informed action.
Effective alerts provide essential details in a quick, digestible format. Each notification should include key information: the job name, scheduled time (e.g., 8:30 AM), field location, and assigned operator. Stick to the MM/DD/YYYY format for dates - for example, 03/15/2026 - to avoid any miscommunication.
Include Clear Job Details
Make your alerts actionable by embedding useful links. Add direct access to digital work orders, checklists, equipment manuals, or instructional videos. This ensures operators have everything they need to complete tasks efficiently from the get-go. For more complex tasks, like calibrating equipment or following multi-step spraying protocols, include a digital checklist within the alert. This reduces the chances of missed steps and minimizes back-and-forth questions, keeping operations on track.
To take it a step further, integrate real-time location and weather data into your notifications.
Add GPS and Weather Data
Boost the utility of your alerts by incorporating GPS and weather insights. Include GPS markers, like gate icons, to help operators navigate directly to the right spot. For tasks like spraying, weather data is critical. Automated alerts can notify teams about unsafe conditions, such as high winds or rain forecasts, which could compromise product safety and crop quality. This helps maintain compliance and ensures better results.
But remember, not all notifications are created equal - too many can dilute their impact.
Prevent Alert Overload
Flooding your team with alerts can backfire. Keep push notifications limited to critical updates, such as new task assignments, urgent machinery issues, or high-priority changes. Combine routine updates into a daily summary to maintain the importance of real-time alerts. As Nicole Replogle, Staff Writer at Zapier, wisely notes:
"When everything's urgent, nothing is - so the more notifications you receive, the less helpful they become".
Transform Your Agricultural Team
Streamline job management, field mapping, and machine tracking with HarvestYield. Simplify your operations and eliminate paper job sheets.
ContinueTest, Monitor, and Improve Alerts
Setting up alerts is just the beginning - you need to ensure they function correctly and fine-tune them as needed. A structured approach to testing and monitoring helps guarantee your team gets the critical updates they need, exactly when they need them.
Test Alerts Before Rolling Them Out
Start by enabling notifications on all devices you plan to use - whether it's a phone, tablet, or laptop. Use the "Send a test" feature in HarvestYield to confirm that tapping a test notification takes you directly to the relevant task. If it doesn’t, double-check your mobile operating system settings to resolve any issues.
Before implementing alerts across your entire operation, conduct a pilot program with a smaller group. Test different scenarios, such as early-morning assignments, unexpected weather delays, or equipment breakdowns. This helps identify potential problems, like timing issues or missing details, before a full rollout. Once the pilot confirms the alerts are working reliably, keep an eye on their performance to ensure they continue to meet your needs.
Monitor Alert Performance
Keep track of task completion statuses - like "Missed", "Skipped", or "Incomplete" - to identify whether alerts are being ignored or arriving at inconvenient times. Review the last 30 days of activity logs to catch any failed triggers or delivery problems. You can also use the "hours spent" feature on tasks to see if alerts are helping improve response times and overall efficiency.
Refine Alerts Based on Feedback
Once you've monitored how alerts are performing, use that data to make improvements. For example, if field operators report confusion about locations, you might add detailed GPS notes with gate icons to prevent crews from entering the wrong fields. Compare planned job hours with GPS-tracked coverage to adjust alert timing, ensuring they reflect realistic schedules and reduce unnecessary delay notifications.
Take user preferences into account as well - such as their preferred measurement settings - so alerts are tailored to your specific equipment and conditions. Over time, update your alerts to match the evolving needs of your operation. Remove outdated notifications and introduce new ones that address current challenges, keeping your system efficient and relevant.
Conclusion
Setting up effective alerts for farm tasks doesn’t have to be complicated. Start by identifying the notifications you need, assigning them to the appropriate roles, and choosing the best communication channels - whether that’s push notifications, email, or SMS. With HarvestYield, you can easily create alert rules that include GPS coordinates, weather updates, and detailed job instructions, ensuring your team knows exactly what to do and where to be.
Before rolling out alerts across your entire operation, it’s smart to test them with a smaller group. Pay attention to how well the notifications work, gather feedback, and make any necessary adjustments. This process guarantees that alerts deliver the right information at the right time, cutting down on confusion and missed tasks.
A well-thought-out alert system boosts team coordination by keeping everyone updated on schedule changes, weather disruptions, or equipment issues. It eliminates the need for paper job sheets and lengthy phone calls, offering real-time navigation and live weather updates instead. By streamlining communication, you can ensure your farm runs smoothly from planning to execution.
If you’re not already using a structured alert system, HarvestYield offers a 30-day free trial with no credit card required. This gives you the chance to set up field maps, create user accounts, and establish alert rules - all at no risk. Whether you’re managing a small crew or coordinating a large team across multiple locations, the right alerts can keep everyone aligned and make your operations more efficient.
FAQs
How do I make sure alerts go to the right team members?
To make sure alerts in HarvestYield reach the right people, start by assigning tasks to the appropriate team members when creating or scheduling jobs. It’s also important that every team member downloads the HarvestYield mobile app and enables push notifications on their device. This ensures they’ll get real-time updates about job assignments, changes, and completions.
Encourage your team to fine-tune their notification settings in the app so they don’t miss any important updates. For larger teams, setting up role-based groups and assigning tasks to these groups can simplify communication. Lastly, double-check that everyone’s contact information is current, and test the alert system ahead of busy seasons to ensure everything runs smoothly.
How can I manage alerts to avoid getting too many notifications?
To make your HarvestYield alerts practical without feeling overwhelming, prioritize what matters most. Start by figuring out which notifications are crucial for your daily activities, such as scheduling jobs or staying updated on team progress. Once you’ve identified these, tweak your settings to enable only the alerts that truly serve your needs.
You can also adjust how frequently reminders pop up. For instance, set reasonable intervals for timer notifications so you’re only alerted when it’s genuinely necessary. If certain alerts become irrelevant, you can easily disable them in your notification settings.
By regularly reviewing and fine-tuning your preferences, you can stay informed without drowning in unnecessary alerts. This helps keep your workflow smooth and your day less stressful.
How can I add weather data to my farm alerts?
Integrating weather data into your farm alerts can make a big difference in how you plan and make decisions. With access to real-time updates and forecasts, you can stay ahead of changing conditions and better manage your operations. While this section doesn’t dive into the exact steps for setting up weather alerts in HarvestYield, the platform does let you customize notifications based on specific weather conditions to keep your farm running smoothly.
For more detailed instructions - like choosing the right weather data source, setting thresholds for alerts, and enabling notifications - check out HarvestYield’s support resources or documentation. These tools are designed to help you easily incorporate weather data into your alerts and improve the way you manage your farm.